Summary
- Every iPhone user should switch on Dark Mode and Battery Percentage display.
- It’s also handy to extend the Auto-Lock window, and set a default Photographic Style if you have an iPhone 16.
- Make sure Wi-Fi Assist is on so you don’t have trouble at the edges of your router range.
While Apple hasn’t used “it just works” as a slogan in years — the phrase dates back to the Steve Jobs era — it still frames how a lot of people perceive the iPhone. The truth, as you’d imagine, is that features are sometimes broken or miscalculated. Or both, in the case of things like ” butterfly” keyboards on MacBooks, or the original version of Apple Maps.
Those mistakes extend to the settings iPhones use by default. Most of them should be fine — but you’ll probably enjoy your new iPhone more once you make a few post-setup adjustments.
Related
Thin is in, but will ultra-slim phones come at too steep a cost?
Does slimness even matter much in 2025?

1 Dark Mode
Save your eyes (and your battery)

Light Mode looks slick on a demo iPhone sitting in an Apple Store, but you shouldn’t be using it on your own device, at least most of the time. It’s harsh on the eyes at night, and makes it harder to wind down when you’re getting ready for bed. It’s even an unnecessary power drain — most iPhones now use OLED displays, which can shut off individual pixels to achieve true black. That means Dark Mode can help extend your battery life.
To enable Dark Mode, follow these steps:
- Go to Settings > Display & Brightness.
- Tap the Dark Mode circle.
- Flip the Automatic toggle if you want the mode to activate after sunrise or sunset, or according to a custom schedule.
I prefer to leave Dark Mode on permanently.

Related
Not sweating it: 4 ways Apple Fitness+ misses the mark
I want to like it, but Apple seems to be catering to a very different demographic.
2 Auto-Lock duration
Avoid getting shut out of your iPhone too quickly

By default, iPhones are set to auto-lock extremely quickly. It’s a security measure, naturally, meant to safeguard your apps and privacy. But if you’re like me and often need to put your iPhone down while you’re in the middle of something, extending Auto-Lock’s window can save you the trouble of repeatedly entering your passcode or getting close enough to trigger Face ID.
- Go to Settings > Display & Brightness.
- Tap Auto-Lock.
- Choose a duration. You’ll want a minute or longer. Avoid choosing Never unless you can remember to put your iPhone to sleep every time you’re not using it.
I find four minutes to be a sweet spot.

3 Battery Percentage
A baffling choice on Apple’s part
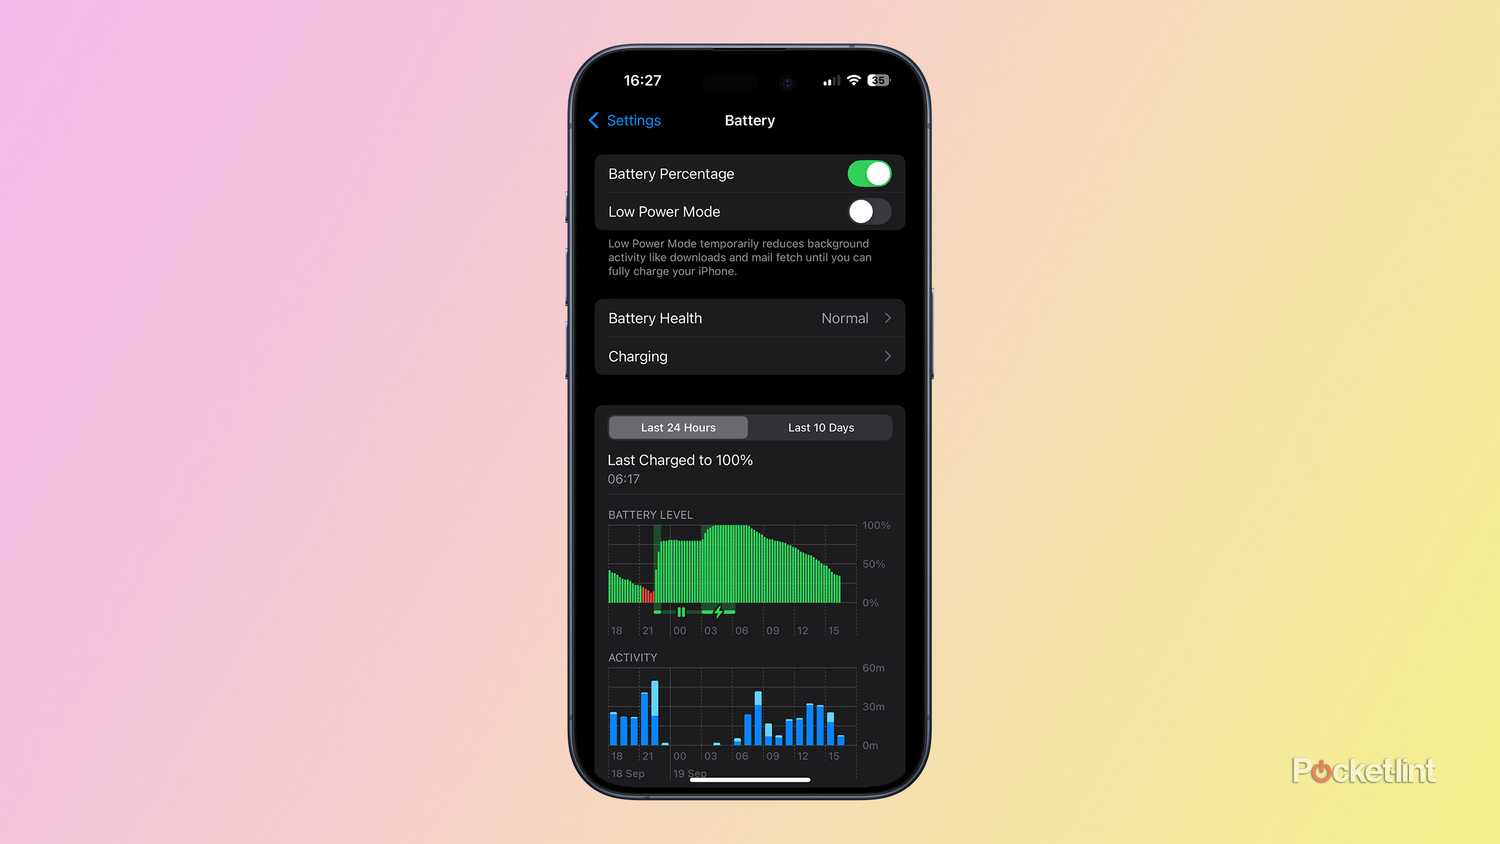
Somehow, Apple continues to think iPhone owners don’t care about exact battery life measures. Sure, the standard icon will give you a rough sense of when it’s time to charge — but some functions are tied to percentages, such as Low Power Mode, which is recommended at 20% and turns off automatically when you get back to 80%.
Fixing this oversight is easy — just go to Settings > Battery, then flip the Battery Percentage toggle. On most iPhones, you’ll see a number appear inside the battery icon in the status bar.
Related
My go-to simple tricks to make my iPhone battery last all day
With these tactics, your iPhone won’t run out of steam before you do.
4 Photographic Styles
Photos that look like they were shot by a human

Photographic Styles are a relatively new addition to iOS, applying custom Tone and Warmth values to the photos you shoot. They may be unavoidable for decent images — the default AI processing of iPhone photos tends to be overly well-lit (as if Apple was terrified of contrast) even though that’s what makes good photos striking.
On an iPhone 16 or 16 Pro, you can set a default Photographic Style using this process:
- Shoot at least four photos with your iPhone.
- Go to Settings > Camera > Photographic Styles.
- Tap Get Started.
- You’ll be prompted to pick four images from your Camera Roll. For the best results, choose photos that represent diverse subjects and settings.
- Swipe between photo tiles to switch between Style types, and tweak them using the slider.
- Tap Continue.
- If necessary, use the Tone & Color grid for fine adjustments, then tap Save Tone & Color.
- Tap Done, or Start Over if you think you can do better.
Related
5 tips for phone photographers that make your pictures not suck
You can do a lot with a little if you think like a pro.
5 Wi-Fi Assist
Don’t struggle with weak hotspots

Eero / Pocket-lint
I sometimes forget this feature exists, but I always check that it’s on whenever I remember. It’s normally on right out of the box — but if you’ve transferred settings from an old iPhone, there’s a chance you’ll have to activate it manually.
What does it do? Contrary to what the name suggests, Wi-Fi Assist automatically switches you over to 4G or 5G when a Wi-Fi signal becomes too weak to be usable. That can be immensely helpful sometimes, say if you’re sitting in your garage or parking lot but still can’t load a website.
Apple imposes a few restrictions to prevent excessive data consumption. Wi-Fi Assist only affects foreground apps, and it may not support some third-party streaming services, or downloading attachments from third-party email clients. It also won’t kick in if you’re roaming, since that could be a recipe for huge phone bills.
Make sure the feature is on by going to Settings > Cellular and looking for the Wi-Fi Assist toggle. You’ll also see how much data has been funneled this way.

Related
Bigger, smaller, or just right? Finding your laptop sweet spot
Biggest isn’t always best — not even if you have thousands of dollars to spend.
Trending Products

Wireless Keyboard and Mouse Combo, EDJO 2.4G Full-Sized Ergonomic Computer Keyboard with Wrist Rest and 3 Level DPI Adjustable Wireless Mouse for Windows, Mac OS Desktop/Laptop/PC (Black)

ASUS VA24DQ 23.8â Monitor, 1080P Full HD, 75Hz, IPS, Adaptive-Sync/FreeSync, Eye Care, HDMI DisplayPort VGA, Frameless, VESA Wall Mountable ,BLACK
TP-Link AXE5400 Tri-Band WiFi 6E Router (Archer AXE75)- Gigabit Wireless Internet Router, ax Router for Gaming, VPN Router, OneMesh, WPA3


Wi-fi Keyboard and Mouse Combo, MARVO 2.4G Ergonomic Wi-fi Pc Keyboard with Telephone Pill Holder, Silent Mouse with 6 Button, Appropriate with MacBook, Home windows (Black)